 |
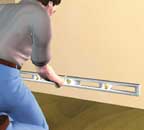
1.
Use a level and a pencil to draw a perfectly parallel line across the wall about 3 inches up from the floor. Measure down from this line to the floor to find the floor's high point (if it has one), and mark a line at that point. From there, measure up 34 1/2 inches and draw a level line across the wall to designate the top of the base cabinets. |
 |
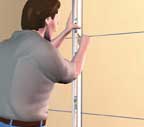
2.
From the 34 1/2-inch line, measure up another 19 1/2 inches and mark a level line across the wall to indicate the bottom of the wall cabinets. Lightly mark the cabinets' dimensions and placement on the wall to double-check your layout. |
 |
3.
Use a stud finder to locate the wall studs, then, with a pencil, mark their locations above and at least 6 inches below the mark you've made for the bottom of the wall cabinets. Draw straight vertical lines between the top and bottom marks to indicate the center of the studs. |
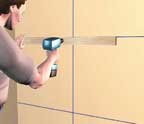 |
4.
Screw a temporary 1-by-3 support rail to the wall, aligning the top edge of the rail with the line for the bottom edge of the wall cabinets. Attach it by driving three or four 2-inch screws through the rail into the wall studs. |
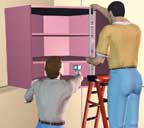 |
5.
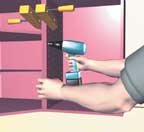
Install the corner wall cabinet first, with a helper. Drill pilot holes through the sturdy cabinet back or its support rail and into wall studs. Screw the cabinet to the wall using two screws that are long enough to penetrate the studs by at least 1 1/2 inches, then check the top for level and the front edge for plumb. To correct the position, back off the screws, tap shims behind the cabinet at stud locations, then drive the screws home and add several more into each stud for secure attachment. |
 |
6.
Install the adjacent cabinets. As you install each one, secure it to its neighbor with a clamp and check it for plumb. On faceframe cabinets, it's easiest to drill two 1/8-inch pilot holes through the sides of the faceframe and use screws.
With frameless cabinets, drill bolt holes through shelf-peg holes, then bolt the two together. Be sure not to fasten through shelf-peg holes that you will need for shelves. |
 |
7.
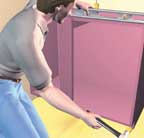
After all the wall cabinets are in place, install the corner or end base cabinet. If necessary, use shims to level it and raise it up to the high point of the floor, so its upper edge aligns with the line on the wall. Be sure it is level from front to back and from side to side, then screw it to the wall studs. |
 |
8.
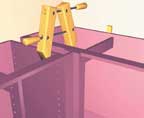
To turn a corner with base cabinets, push the adjoining cabinet in place and clamp the two units together. Add a filler strip if needed to allow doors and drawers clearance. If necessary, tap shims under the cabinet and behind it to adjust for plumb and level. |
 |
9.
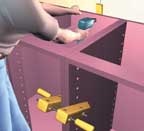
Drive screws through the cabinet back (and shims) into the wall studs. Trim any excess material from the shims with a sharp chisel or knife. Continue to add adjoining cabinets in this manner, joining them as you did the wall cabinets in step 6.
 |