

Unlock the Secrets of Painting Unfinished Cabinets: A Comprehensive Guide

by Gary Wade • September 28, 2023
When it comes to home improvement projects, few things can transform a space like a fresh coat of paint. If you have unfinished cabinets in your kitchen or bathroom, painting them is a cost-effective way to give them a polished and professional look.
In this comprehensive guide, we will walk you through the process of painting unfinished cabinets, from the importance of painting them to the tools and materials you will need. By the end, you'll have all the knowledge you need to tackle this project and create the kitchen of your dreams.
Importance of painting unfinished cabinets
Painting unfinished cabinets is not just about aesthetics; it also serves a functional purpose. Unfinished cabinets are more susceptible to damage from moisture, stains, and daily wear and tear.
By painting them, you create a protective barrier that not only enhances their appearance but also extends their lifespan.
Additionally, painting your cabinets allows you to personalize your space and update the overall look of your kitchen or bathroom without the need for a costly renovation.
Tools and materials needed for painting cabinets
Before you begin painting your unfinished cabinets, it's important to gather all the necessary tools and materials. Here is a list of items you will need for this project:
- Screwdriver or drill: You will need this to remove the cabinet doors and hardware.
- Drop cloths or plastic sheets: These will protect your countertops and floors from paint splatters.
- Sandpaper or sanding block: This is essential for preparing the cabinets and creating a smooth surface for painting.
- Tack cloth: Use a tack cloth to remove any dust or debris after sanding.
- Primer: Choose a high-quality primer specifically designed for use on cabinets.
- Paintbrushes: Opt for brushes with synthetic bristles for a smooth and even application.
- Roller and tray: A roller is ideal for painting larger surfaces, while a tray will hold the paint.
- Paint: Select a paint specifically formulated for cabinets, such as an enamel or acrylic-latex hybrid paint.
- Painter's tape: Use painter's tape to protect areas you don't want to paint, such as the walls or countertops.
- Cabinet hardware: Consider updating your cabinet hardware to complete the transformation.
Preparing the cabinets for painting
Proper preparation is crucial to achieving a professional-looking finish on your painted cabinets. Start by removing all cabinet doors, drawers, and hardware using a screwdriver or drill.
Lay them flat on a protected surface, such as a drop cloth or plastic sheet. This will make it easier to paint them evenly and avoid drips.
Next, thoroughly clean the cabinets to remove any grease, dirt, or grime. Use a mild detergent or a mixture of warm water and vinegar. Scrub the surface with a sponge or soft cloth, paying special attention to areas that are frequently touched, like handles and knobs. Rinse with clean water and allow the cabinets to dry completely before moving on to the next step.
Sanding and priming the cabinets
Once the cabinets are dry, it's time to sand them to create a smooth surface for the paint to adhere to. Use a fine-grit sandpaper or sanding block to gently roughen the surface of the cabinets.
This will help the primer and paint bond better and prevent peeling or chipping in the future. Be sure to sand in the direction of the wood grain for the best results.
After sanding, use a tack cloth to remove any dust or debris from the surface of the cabinets. This step is crucial to ensure a clean and smooth paint application. Once the cabinets are clean, it's time to apply the primer.
Choose a high-quality primer specifically designed for use on cabinets. Apply a thin, even coat of primer using a brush or roller, making sure to cover all surfaces, including the edges and corners. Allow the primer to dry completely before moving on to the next step.

Choosing the right paint for unfinished cabinets
When it comes to choosing the right paint for your unfinished cabinets, there are a few factors to consider.
First, opt for a paint specifically formulated for use on cabinets, as these are designed to withstand the demands of a kitchen or bathroom environment.
Look for paints labeled as enamel or acrylic-latex hybrids, as these offer excellent durability and a smooth finish.
In terms of color, the options are virtually endless. Consider the overall style and color scheme of your kitchen or bathroom when selecting a paint color.
Lighter shades can make a small space feel larger and more open, while darker colors can add drama and sophistication. Don't be afraid to experiment with different colors and finishes to create a look that reflects your personal style.
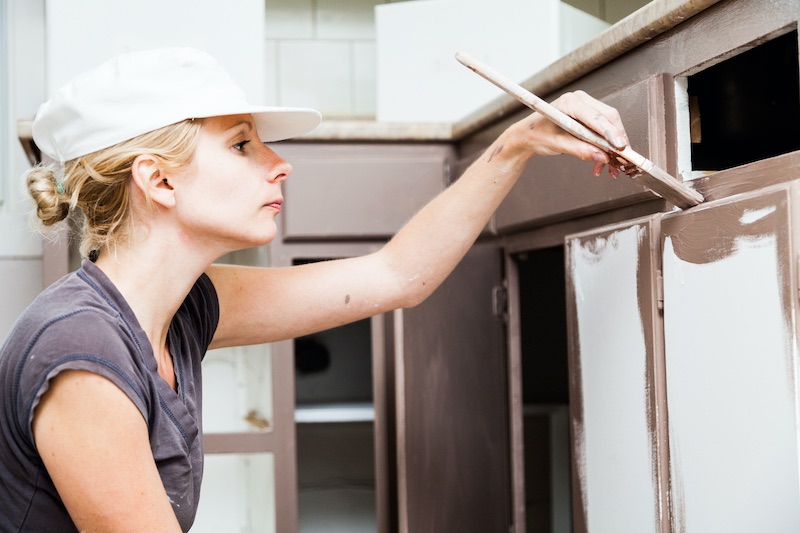
Painting techniques for a professional finish
Now that you have prepared the cabinets and chosen the right paint, it's time to apply the paint. Follow these painting techniques for a professional-looking finish:
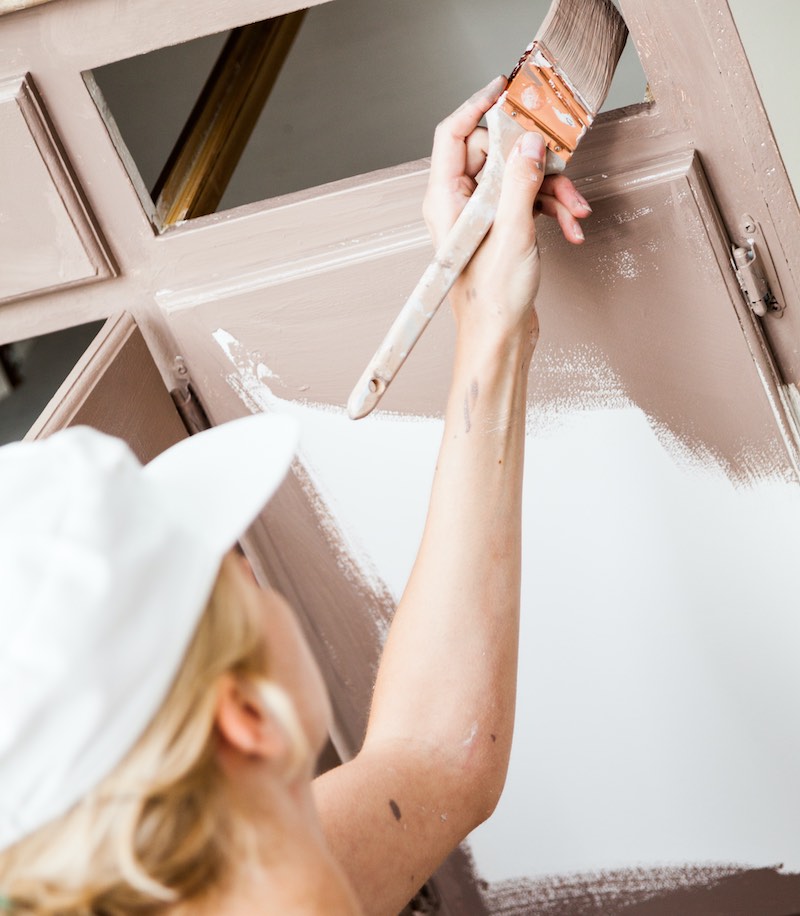
- Start with the cabinet doors and drawers. Apply a thin, even coat of paint, working in long, smooth strokes in the direction of the wood grain. Avoid overloading the brush or roller with paint to prevent drips or uneven coverage.
- Once the doors and drawers are painted, move on to the cabinet frames. Again, apply the paint in thin, even coats, working in the direction of the wood grain.
- Allow the first coat of paint to dry completely before applying a second coat. This will ensure a smooth and even finish.
- If necessary, lightly sand between coats to remove any imperfections or brush marks. Be sure to remove any dust or debris before applying the next coat of paint.
- Repeat the painting process until you achieve the desired coverage and finish. Allow the final coat of paint to dry completely before reattaching the cabinet doors and hardware.

Tips for painting kitchen cabinets
Painting kitchen cabinets can be a time-consuming and labor-intensive task, but with the right tips and techniques, you can achieve professional results. Here are some tips to help you along the way:
- Take your time: Painting cabinets requires patience and attention to detail. Rushing the process can result in a sloppy finish. Set aside enough time to complete the project without feeling rushed.
- Label the doors and hardware: To make reinstallation easier, label each cabinet door and its corresponding hardware with a piece of tape. This will ensure that everything goes back in its proper place.
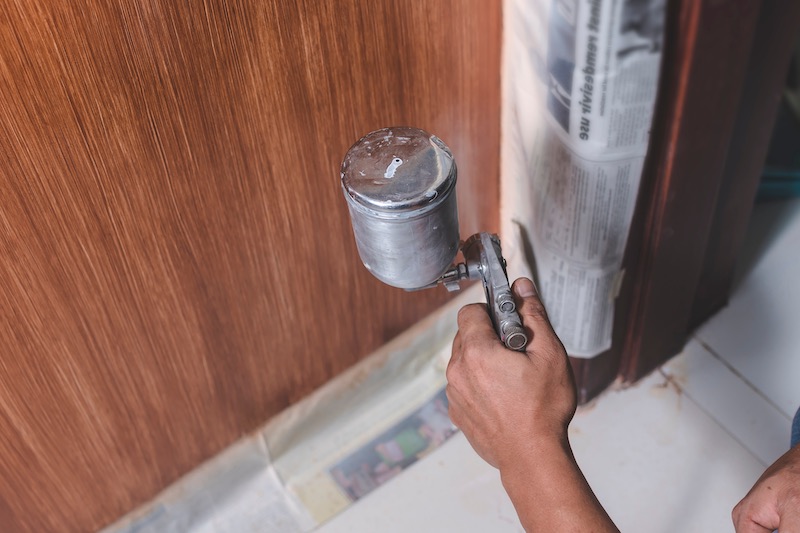
- Use a paint sprayer for a smooth finish: If you have access to a paint sprayer, consider using it for the cabinet frames. A sprayer can provide a smoother finish than a brush or roller, especially on larger surfaces.
- Consider painting inside the cabinets: For a more cohesive look, consider painting the inside of the cabinets as well. This can add a pop of color and make your cabinets feel more finished.
- Don't forget to seal: Once the paint has fully dried, consider applying a clear topcoat or sealer to protect the cabinets from scratches and stains. This will help extend the life of your newly painted cabinets.
Common mistakes to avoid when painting cabinets
While painting cabinets can be a rewarding DIY project, there are some common mistakes that you should avoid:
- Skipping the proper preparation: Properly preparing the cabinets by cleaning, sanding, and priming is crucial for a long-lasting finish. Skipping these steps can result in paint peeling or chipping over time.
- Using the wrong paint: Using a paint that is not specifically formulated for cabinets can lead to a subpar finish. Make sure to choose a high-quality paint designed for use on cabinets to ensure durability and longevity.
- Applying too thick of a coat: Applying a thick coat of paint may seem like a time-saver, but it can lead to drips, uneven coverage, and longer drying times. Always apply thin, even coats, and allow each coat to dry completely before applying the next.
- Neglecting to remove hardware and doors: Removing cabinet hardware and doors before painting ensures a more professional-looking finish. It also prevents paint from getting on the hinges and handles, making reinstallation easier.
- Rushing the drying process: Patience is key when painting cabinets. Rushing the drying process can result in smudges, fingerprints, or damage to the finish. Allow each coat of paint to dry fully before applying the next.
How to properly clean and maintain painted cabinets
Once you have successfully painted your unfinished cabinets, it's important to know how to properly clean and maintain them to keep them looking their best. Here are some tips for cleaning and maintaining painted cabinets:
- Use a mild detergent: When cleaning your cabinets, use a mild detergent or a mixture of warm water and vinegar. Avoid harsh chemicals or abrasive cleaners, as these can damage the paint finish.
- Wipe spills promptly: If any spills occur, wipe them up promptly to prevent stains or damage to the paint.
- Avoid excessive moisture: Excessive moisture can cause the paint to peel or bubble. Use exhaust fans or open windows when cooking or showering to reduce humidity levels in the kitchen or bathroom.
- Handle cabinets with care: Be gentle when opening and closing cabinet doors to avoid scratching or chipping the paint. Avoid using abrasive materials or harsh scrub brushes when cleaning.
- Touch up as needed: Over time, your painted cabinets may develop small chips or scratches. Keep a small amount of touch-up paint on hand to address any imperfections as they arise.
Transforming unfinished wood cabinets with paint
Painting unfinished wood cabinets is a great way to transform their appearance and give them a fresh, updated look.
With the right tools, materials, and techniques, you can turn your plain, unfinished cabinets into a focal point of your kitchen or bathroom.
Follow the steps outlined in this guide, and you'll be well on your way to achieving the kitchen of your dreams.
Hiring professionals vs. DIY cabinet painting
While painting cabinets can be a rewarding DIY project, it's not for everyone. If you don't have the time, patience, or confidence to tackle this project on your own, hiring professionals may be the right choice for you.
Professional cabinet painters have the experience, tools, and expertise to deliver a flawless finish and can often complete the job in a fraction of the time it would take an inexperienced homeowner.
Consider your budget, timeline, and skill level when deciding whether to hire professionals or tackle the project yourself.
Enjoy your beautifully painted cabinets
Painting unfinished cabinets is a cost-effective way to update your kitchen or bathroom and create a space that reflects your personal style.
By following the comprehensive guide outlined in this article, you now have all the knowledge and tools you need to tackle this project with confidence.
Take your time, follow the proper steps, and enjoy the process of transforming your unfinished cabinets into beautiful focal points. So go ahead, learn how to paint unfinished cabinets and get the kitchen of your dreams.